Imaging Toolkit 14 includes cloud-based deployment monitoring named the ENGL Monitor Service. Once configured, Imaging Toolkit can send deployment progress, status updates, log files and errors to the Monitor Service. Using the ENGL portal (Account > Monitor Service) deployments can be viewed together with log files and detailed status. Functionality is restricted based on your Imaging Toolkit subscription level. See the Imaging Toolkit subscription levels for further details.
Customers with an active ENGL Deployment Monitor (on-premise installation) license will be automatically ported to the Advanced subscription level which includes additional Monitor Service functionality.
This TID provides the steps to configure Imaging Toolkit imaging and deployment processes to include progress monitoring using the Monitor Service.
- Requirements
- User access to the Monitor Service
- Configuring Imaging Toolkit
- Using groups to identify a site or department
- Creating shareable guest monitor views
- Testing
Requirements
The Monitor Service has the following requirements:
- Imaging Toolkit 14 (14.0.3 for Monitor Groups)
- Firewall access to https://monitorservice.engl.co.uk:443 for all client machines being deployed
- Access to the ENGL portal (Account > Monitor Service) using the ENGL license or technical contact
User access to the Monitor Service
By default, your ENGL license and technical contact will have access to the Monitor Service.
Warning: Users with the Admin role, will have access to Monitor Service settings.
To modify user access and their roles, perform the following steps:
- Login to the ENGL portal then select Account > Monitor Service.
- Click the Settings cog.
- Select the Security tab.
- In the User Roles section, add, modify or remove users.
Configuring Imaging Toolkit
Complete the following steps to configure the Imaging Toolkit imaging and deployment process to send status updates and log files to the Monitor Service.
- Backup the server TFTP folder.
- Locate then modify the following lines in the [TFTP server]\zimfiles\zim.cfg to include the Monitor Service endpoint.
Set:_MonitorServer,"https://monitorservice.engl.co.uk"
Set:_MonitorPort,"443"
Using groups to identify a site or department
Monitor groups can be defined to represent sites or departments and used to filter deployments view in the Monitor Service. Once a machine has been deployed using a group code, that group will be permanently stored with that machine's deployment.
Note: Requires Imaging Toolkit 14.0.3 (Advanced/Enterprise subscription).
- Login to the ENGL portal then select Account > Monitor Service.
- Click the Settings cog.
- Select the Workspace tab.
- Scroll down to the Groups section.
- Add a group code and description, e.g. code "SITE1" and description "Site 1".
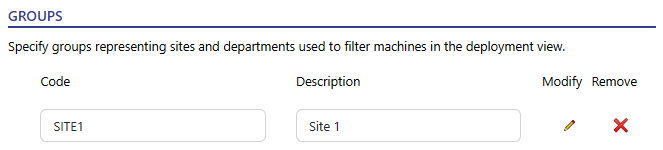
- Click Apply to save the changes.
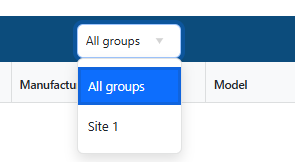
- In the Deployments header you'll now see the a group dropdown list that includes "All groups", and any groups you've added.
- Backup the server TFTP folder.
- Locate then modify the following lines in the [TFTP server]\zimfiles\zim.cfg to include the Monitor Service Group code.
Set:_MonitorServer,"https://monitorservice.engl.co.uk"
Set:_MonitorPort,"443"
Set:_MonitorGroup,"SITE1"
Creating shareable guest monitor views
Guest Monitor views can be created and shared for use in departmental wall displays etc. Shared views do not require authentication and include a read-only Monitor view.
Note: Requires Imaging Toolkit Advanced/Enterprise subscription.
- Login to the ENGL portal then select Account > Monitor Service.
- Click the Settings cog.
- Select the Security tab.
- Scroll down to the Guest Shared Views section.
- Add a guest view with a description, expiry date and optional group short code.
Note: If a group is not specified then all deployed machines will be displayed. If a group is specified it cannot be changed in the guest shared view.
- Click the Link icon to copy the guest shared view URL to the clipboard.
- Click Apply to save the changes.
Testing
Perform the following steps to test the Monitor Service configuration.
- Login to the ENGL portal then select Account > Monitor Service.
Note: If you do not have access please contact your ENGL license or technical contact. - Boot a machine to the ENGL WinPE imaging front-end using PXE or USB, from the ENGL imaging menu, select Restore menu, then select a project that has been configured for the Monitor Service.
- The ENGL portal will display updates from the machine as it is deployed.